
Hey, cake lovers! 🌟 Today, we’re diving into something super cool (literally) – the ultimate DIY Dairy Queen Ice Cream Cake!
Hey, cake lovers! 🌟 Today, we’re diving into something super cool (literally) – the ultimate DIY Dairy Queen Ice Cream Cake!
This recipe is all about bringing that epic DQ vibe to your home. So, if you’re obsessed with those layers of creamy goodness, fudge, and crunchy chocolate bits (I mean, who isn’t?), keep reading! Let’s get this ice cream cake party started. 🎉
Ingredients:
Sprinkles, crushed Oreos, or extra chocolate bits for topping
1.5 quarts of chocolate ice cream
1.5 quarts of vanilla ice cream
1 package of Oreo cookies (or any chocolate sandwich cookies)
1 jar of hot fudge sauce
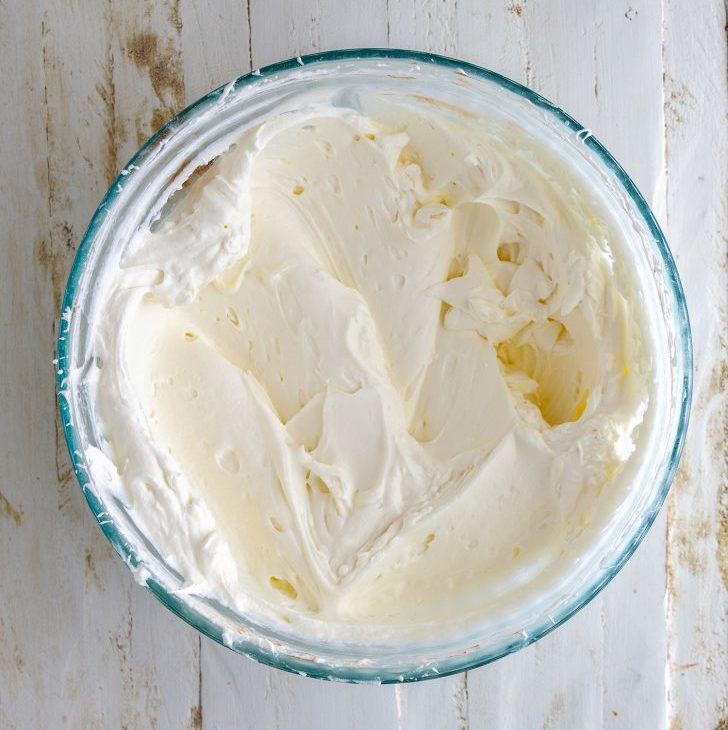
1 container of whipped topping (like Cool Whip)
Chocolate syrup (optional)
Step 1: Prep Time!
First things first, let’s make sure your ice cream is ready to go. Pull both the chocolate and vanilla ice creams out of the freezer and let them soften a bit. You don’t want them melty, just soft enough to spread easily.
Step 2: Crush It Up!
While the ice cream is softening, grab your Oreo cookies and crush them into tiny pieces. You can do this by putting them in a ziplock bag and smashing them with a rolling pin or just by hand if you’re feeling strong 💪.
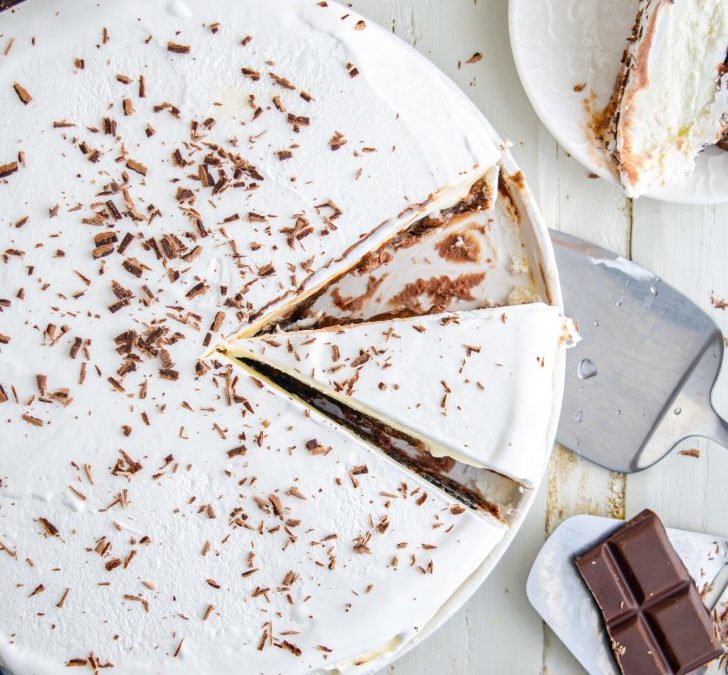
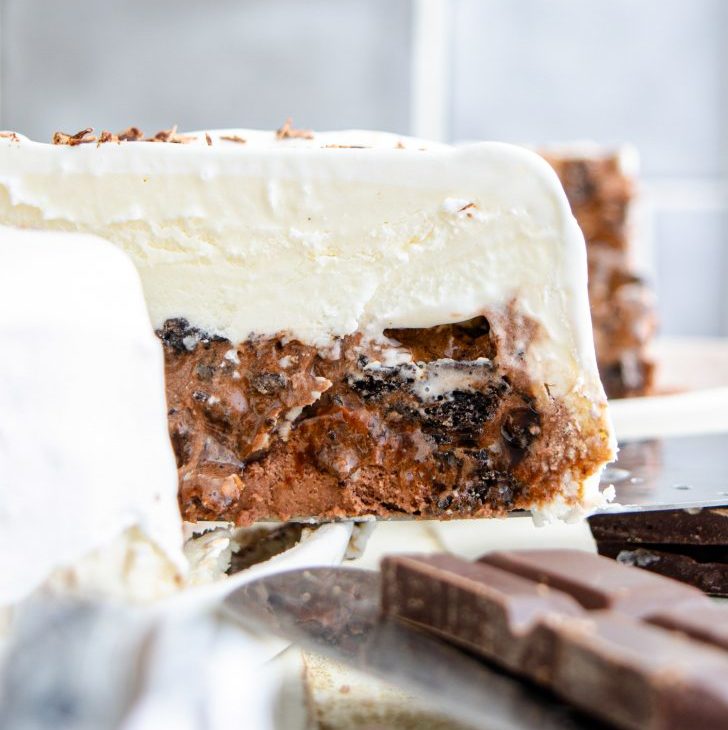
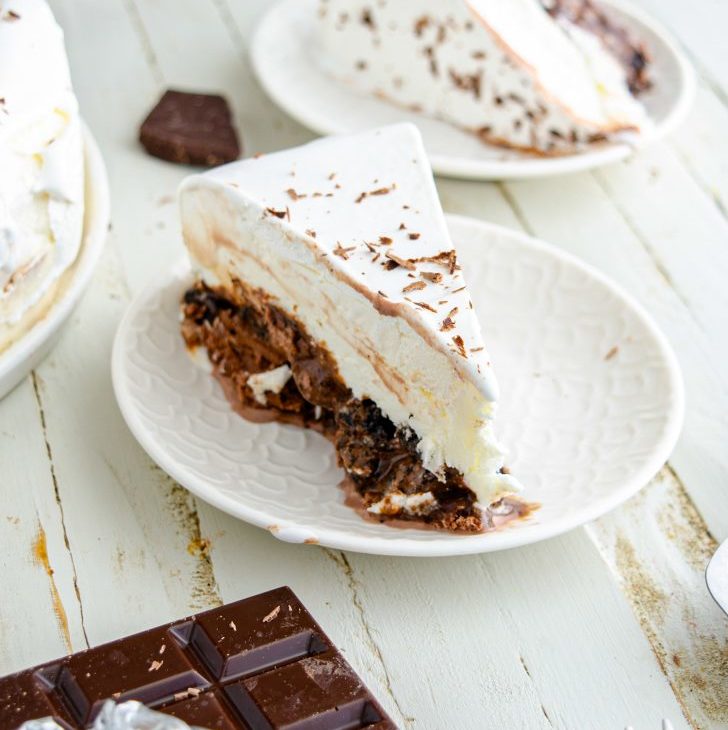
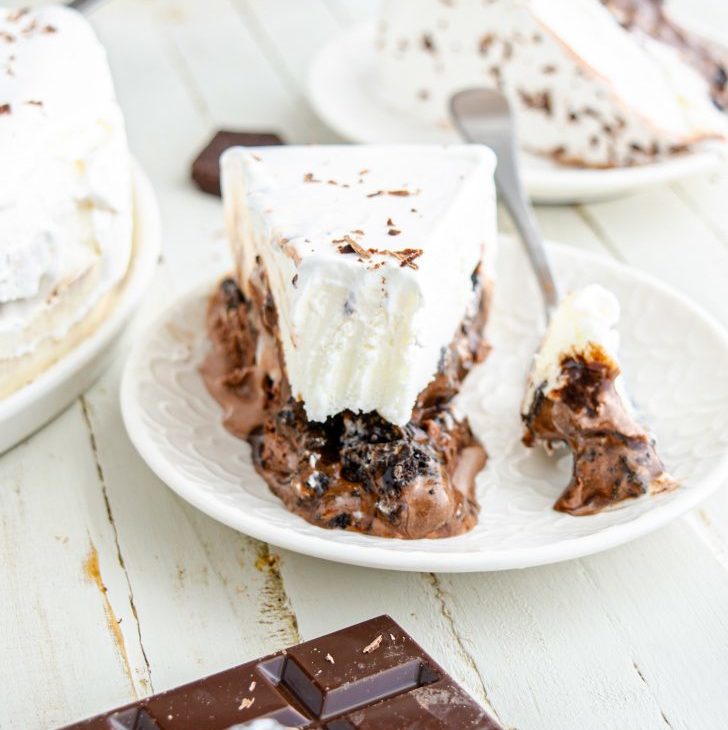
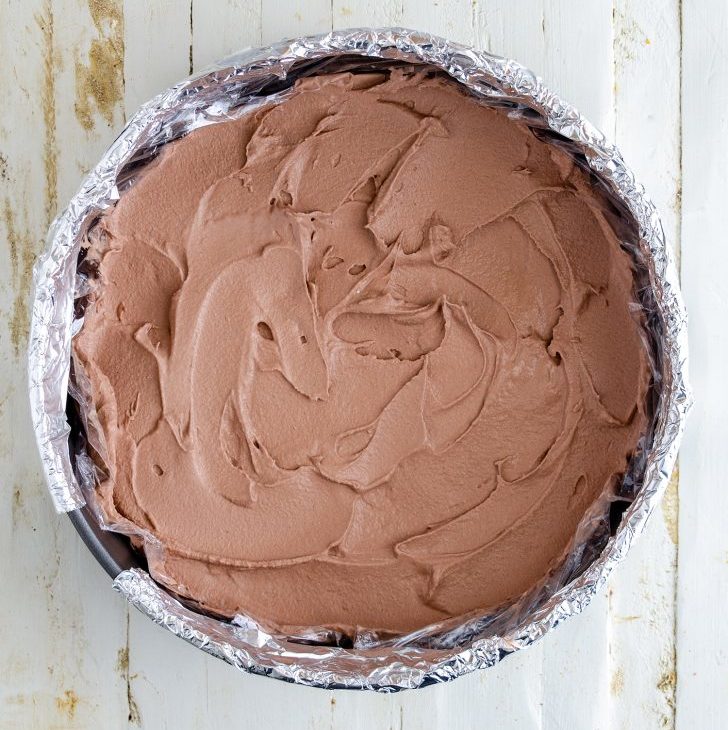
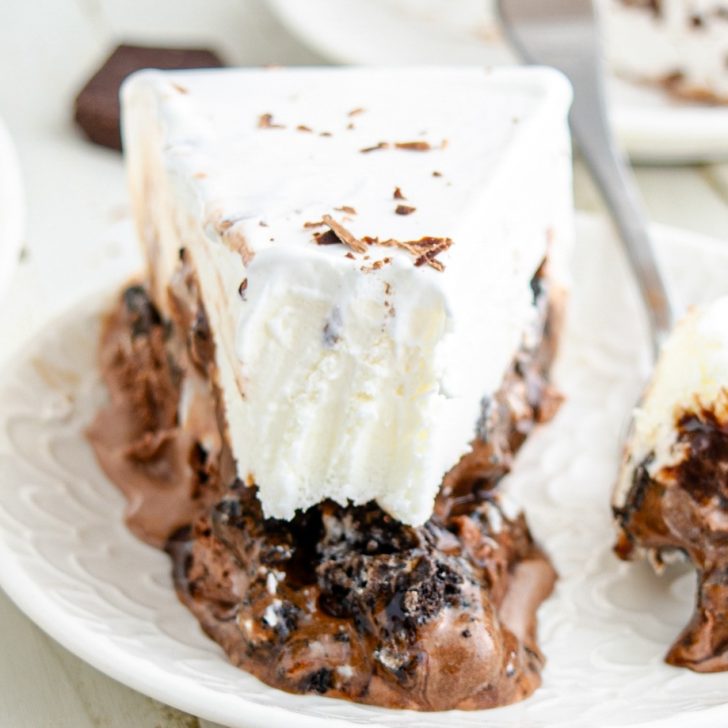
Step 3: Layer the Chocolate Ice Cream
Take a 9-inch springform pan (or any round cake pan) and spread a thick layer of softened chocolate ice cream at the bottom. Make sure it’s nice and even. Once done, pop it back into the freezer for about 20-30 minutes to firm up.
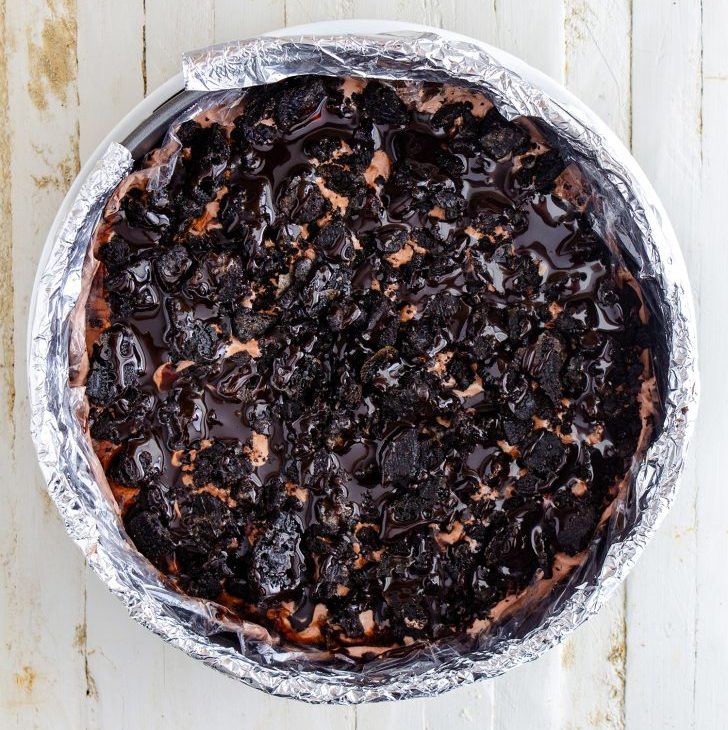
Step 4: The Fudge Layer
While your chocolate layer is chilling, heat up your hot fudge sauce just enough so it’s pourable (but not too hot!). Pour it over the chocolate ice cream layer, and then sprinkle your crushed Oreos on top. This is where the magic happens – it’s that classic crunchy fudge layer we all love! Put it back in the freezer to firm up again.
Step 5: Vanilla Ice Cream Time
Once your fudge layer is solid, spread the softened vanilla ice cream on top. Make it smooth and even, then toss it back in the freezer for another 20-30 minutes.
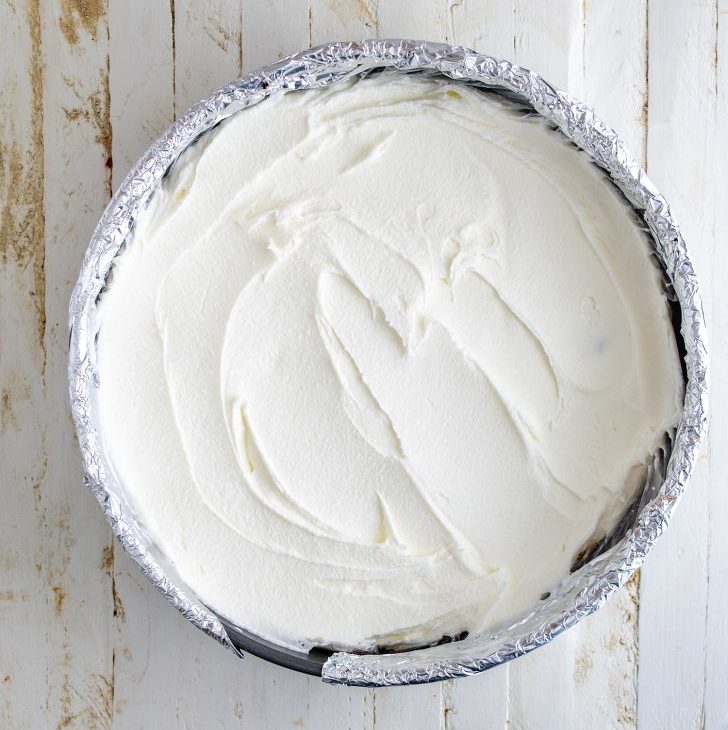
Step 6: Whip It Good
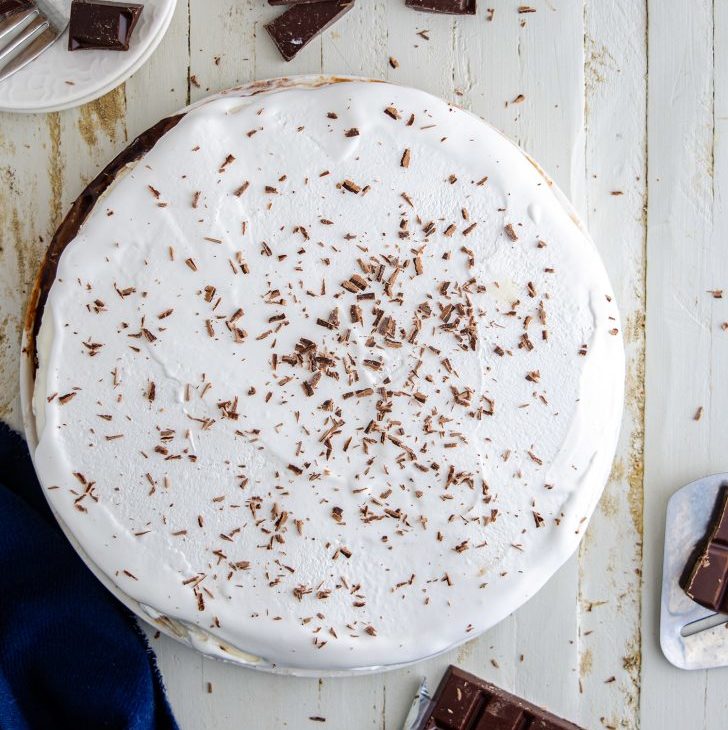
After the vanilla layer has firmed up, it’s time to top it with whipped cream! Spread a thick layer of whipped topping over the vanilla ice cream. You can get creative here – drizzle some chocolate syrup, add sprinkles, or even more crushed Oreos for that extra wow factor.
Step 7: Freeze and Feast!
Pop your masterpiece back into the freezer for at least 2-3 hours or until it’s totally solid. When you’re ready to serve, let it sit out for a few minutes to soften slightly, then slice and enjoy your DIY DQ Ice Cream Cake!

Pro Tips:
Got leftovers? (Unlikely, but just in case) – keep your cake covered in the freezer, and it’ll stay yummy for up to a week.
Want to mix it up? Try using mint chocolate chip instead of vanilla or adding caramel sauce to the fudge layer.
And there you have it, folks! A homemade Dairy Queen Ice Cream Cake that’ll have everyone asking for seconds (or thirds). Perfect for birthdays, celebrations, or just because it’s Tuesday. Don’t forget to snap a pic before everyone devours it, and tag me if you post it on the ‘Gram! 📸